
 Jane and John's RV pages
Our Sony Backup Cam Monitor is sick, but Tim at RVcams.com to the rescue
Actually I wasn't absolutely positive if the backup cam itself or the monitor was going bad, but since the picture was 'blooming' (it got brighter and lost contrast) when first turned on, I strongly suspected the monitor itself was going bad. Unfortunately Sony got out of the RV camera market a few years ago so I had an orphan on my hands. Gave Tim at RVcams.com a call and he said no more Sony parts available but he does have a good replacement for the Sony VCB-MHD1 Color Monitor, a Voyager with an adapter to convert the Sony cam plug to the Voyager format. So I get the Voyager and the conversion kit ordered from Tim and exchanged the Sony monitor for the Voyager.

Our Sony VCB-MHD1 monitor replacement kit
So, what's involved?
Unfortunately the Voyager housing adapter (not sure what it's officially called) was not a drop-in replacement for the Sony. Close but not close enough and I had to perform a little surgery on the opening and file down the trim ring a bit. If the housing/trim ring would have been just a fraction of an inch wider, this would not have fit without more drastic surgery.
The Voyager camera and monitor inputs use a different plug/jack from the Sony but no worries, Tim has a nifty adapter that makes this plug 'n play. You will need to do a little wire splicing though for the monitor power and the reverse trigger, but only three wires are involved. If you have side cameras, I'm not sure if Tim sells a magic box that will automatically switch cameras based on a turn signal.
Can I do this myself?
Nothing complicated going on here, basic hand tools are needed, maybe a Dremel [see note below] type tool with a cut-off blade to widen the dash opening, and the ability to deal with the three wires that need to be spliced. You can go the strip/solder/heat shrink tubing route or use crimp splices. (I don't like using the crimp butt connectors with small gauge wire - too easy to not get a tight crimp and have the wire pull out.)
[If you don't already have a Dremel tool, don't buy one. You want this German made Proxxon!]
Order of work
You obviously don't want to be replacing the monitor if the monitor is actually okay and you have a bad camera instead. In my particular situation, I was fairly confident I had a bad monitor because the picture would be normal for a few seconds and then bloom in brightness and lose detail and contrast. I've had a couple of side cams go bad and this was not their typical behavior when they went south. The bad cams would lose their image and stay that way permanently. If you have any doubts about what component is bad, I'm sure RVcams.com can help you diagnose the problem.
- Make certain (as much as possible) your monitor is bad before ordering a replacement
- Remove the dash panels, large left one first, then smaller right side
- Test your new Voyager replacement with your cams! Temporarily run 12V to power the monitor and plug a cam in. Fixes the problem? Continue on...
- Remove the Sony monitor - two knobs on each side (one of them is tough to access with fat short fingers!)
- Use the Voyager monitor housing adapter as a template to determine how much you need to trim the dash opening (see the pictures)
- Fit the housing to the opening, attach with four small flat head sheet metal (or wood) screws, I think I used #8 x 1/2"
- Install the Voyager monitor into the housing, it will click in and be flush when properly in position
- Wire up power, reverse trigger and plug in the cam(s)
- Tidy up the wiring, get the vacuum cleaner and chase the dust bunnies around
- Put it back together
- Kick back and revel in your accomplishment
Okay, let's get to the pictures! (pix description will be under the pix)

Keep in mind, this is our 2005 Winnebago Itasca Horizon but it should directly apply to model years 2004 to maybe 2007 Vectra or Horizon.
So, let's see what's under the large dash. Remove three screws (red arrows) and pull the dash cover to the front and then lift up

Did I spell cowl correctly? Oh well. Now we remove the right side cowl, remove two screws and lift out of the way
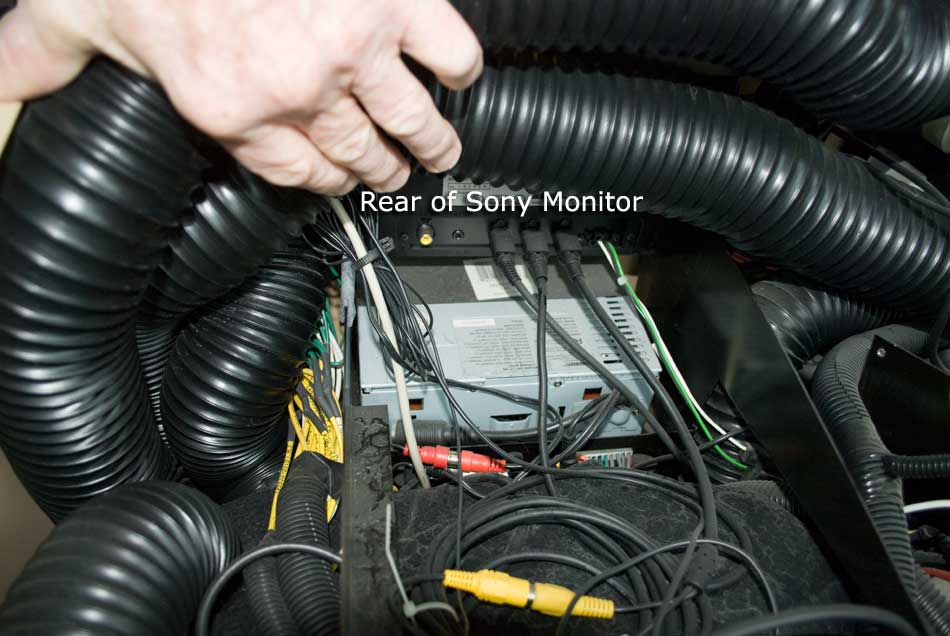
Right under the white text are the Sony monitor plugs. Green/white/black wires are power and reverse trigger.
Unplug anything plugged into the Sony. The silver box is the "RV Radio" that came with the Horizon, it's a very low-end radio
and I was thinking about replacing it with a modern version but not now

Before you go tearing up things, make certain your cam is working - test with the Voyager monitor!

One of these knobs is difficult to access. Remove knobs and pull out the monitor (next pix)
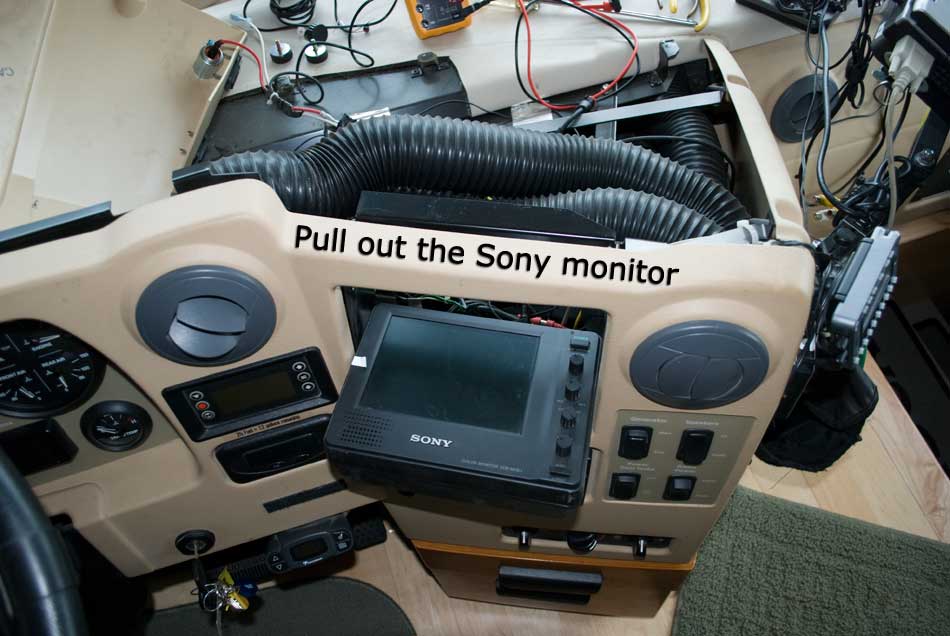
Goodbye old friend :(
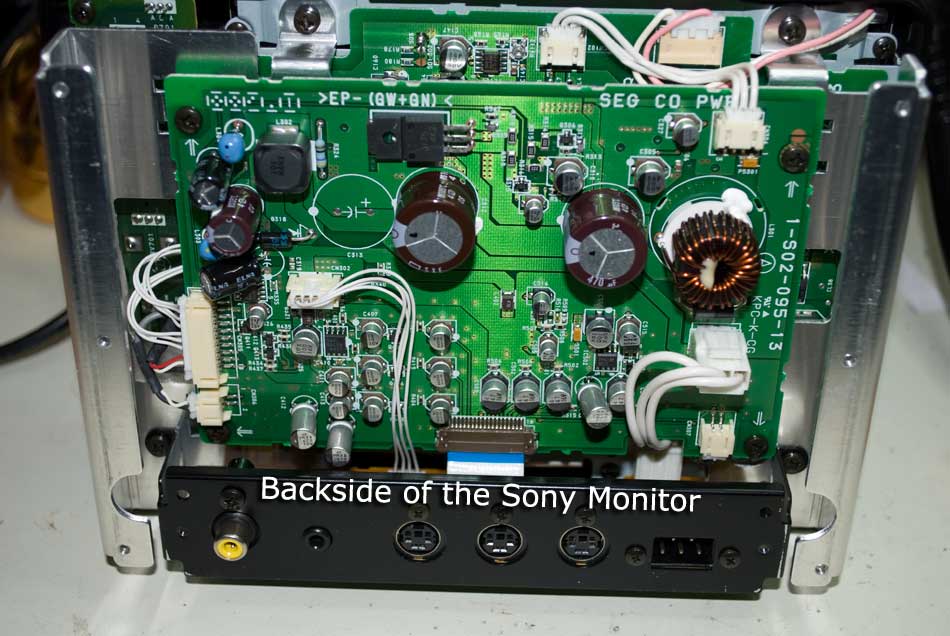
Beautifully made as I discovered when taking it apart on the bench. I'll have a go at repairing it
>> On to Page Two