
 Jane and John's RV pages
We finally kiss the one-thirds goodbye!
Hello Garnet SeeLevel tank monitor system
>Page 3 - we finish disassembly of the plumbing bay and look at wiring
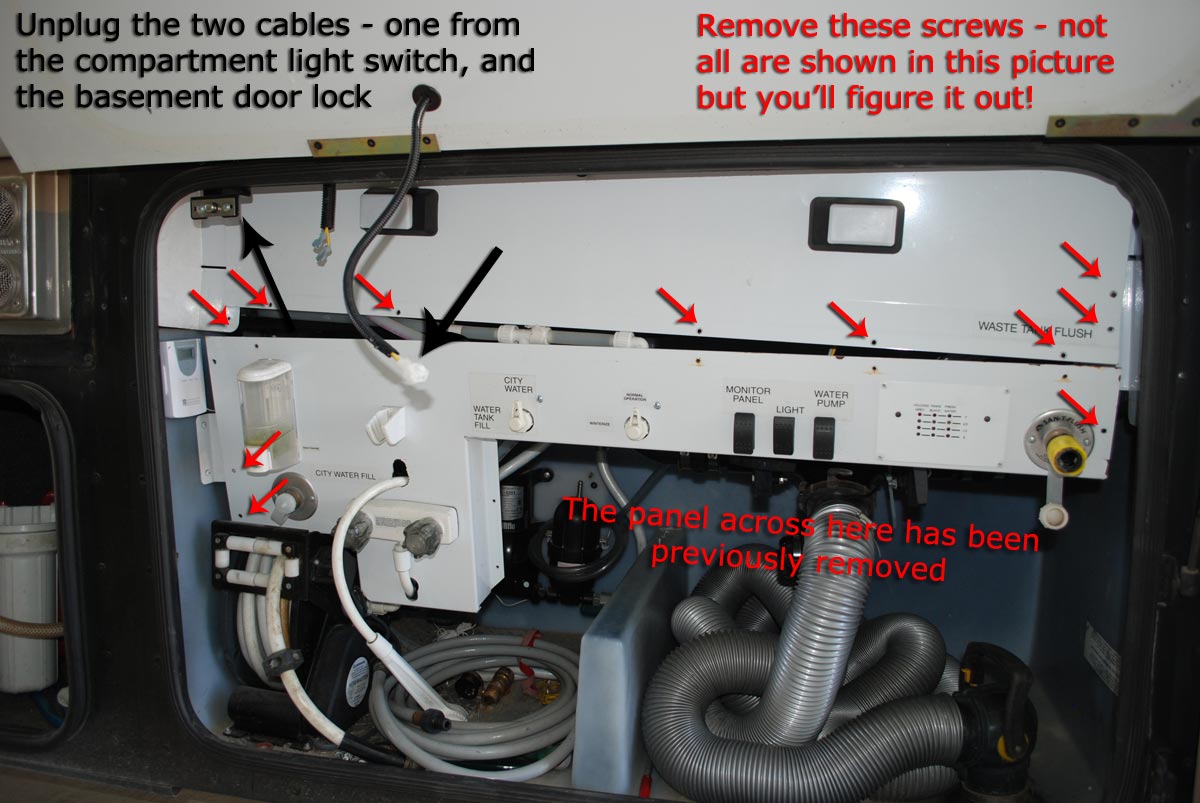
If you are jumping around the pages, on page two I showed a picture where the top panel has three screws to the left of the door gasket that much be removed! I should have put those three arrows on this picture, but I was tired of making arrows ;-)

Screws at the top, sides, bottom

The top panel will take a little finagling but it DOES come out and this picture is proof! With the panel removed you can see your black tank (left) and the gray tank (right) and the stock Winnebago tank sensors (square black things.)
It isn't necessary to remove the sensors on the black tank (left tank), but I found it desirable to remove the left two sensors on the gray tank to make adequate room for the new sensor strips. Note: the sensors are very difficult to remove but they will begrudgingly come off. Try a metal putty knife and some solvent (maybe GooGone or lacquer thinner, etc.) and keep working at it. I briefly used a sharp wood chisel but after making a tiny slice in the tank wall, I put that tool away!

Remove the display bezel, pull the two plugs out. Since I used the old bezel as a drill template, I removed the old circuit board (use a 1/4" nut driver.) The wiring out here couldn't be simpler for your new Garnet SeeLevel - black wire is +12 volts, white is ground, and I used the red wire for the new sensors (the three tank sensors only need a ground wire and one other wire since they each report to the displays with a unique ID.)
Page 1 - project introduction
Page 2 - pictures of the 'special tools' and jigs I used, picture of the Garnet system, disassembly of the plumbing bay part 1
>Page 3 - we finish disassembly of the plumbing bay and look at wiring
Page 4 - we test and finish up sensor strip installation
Page 5 - building a bezel for the outside display, finishing up the outside
Page 6 - access to the fresh water tank, installing the sensor strips on the tank wall, sensor wiring
Page 7 - we start installing the inside display, removal of the old display board & switches, cutting off the solar panel part of the old circuit board (optional), cutting an opening in the OnePlace steel panel for the new display
Page 8 - Wiring and project wrap-up