
 Jane and John's RV pages
We finally kiss the one-thirds goodbye!
Hello Garnet SeeLevel tank monitor system
>Page 7 - we start installing the inside display, removal of the old display board & switches, cutting off the solar panel part of the old circuit board (optional), cutting the new opening in the old panel
First off, you need to decide if you want to completely remove the old monitor circuit board and pushbuttons and install the new Garnet display into the now vacant space (my choice), or install the new display on top of the old one. Some have used a surface mount electrical box or you could make something from wood. I wanted the new display to look as much like it came from the factory as possible, so I replaced the old display with the new one.
Let's run down the sequence of steps I used before we get into the pictures, that might help you get a handle on what to do and when.
- get a tall cardboard box so you can rest the OnePlace on it while you work. You will have an alligator on your hands if you don't prop up the panel
- remove the OnePlace panel (one screw on the top, one on the bottom of the frame)
- remove the wires from the old tank monitor pushbuttons
- remove the old circuit board
- pop the cover off the thermostat for the bed/bath area (Vectra/Horizons have a second LP furnace) and unscrew the two mounting screws. Let it hang loose
- make a paper template for the new display and position it over the old monitor openings and mark where you need to cut the rectangular opening (you will need to use a thin board (I used a piece of aluminum flashing I had lying around) to cover up some holes since the new display doesn't have a large enough footprint)
- before you start cutting on the panel, cover up the floor with an old sheet and it wouldn't hurt to cover up nearby counters so you don't get the co-pilot mad at you ;-) and cover up the area around the steel panel with blue masking tape so you won't mess up the paint
- cut out the new opening - to make the cuts, I found it fairly easy to use a Dremel tool with a cut-off wheel. I do not recommend a saber/jig saw - too messy and they are too big to easily use in that tight area, but suit yourself
- prepare/spray paint (use flat black or try a satin black - test them first) your aluminum flashing that will hide the existing holes
- install the new display panel
- hook up wiring and test
- if you want to continue to use your solar panel, I'll show you how to do that assuming you removed the old display circuit board (kudos to somebody over on iRV2 for that idea)
- put it back together and play with the buttons and admire your work, then grab the co-pilot and let them push buttons while heaping praise and admiration on you for such a useful modification to your RV. While you have good will and good feelings at a peak, time to take advantage of the situation and rush off and buy that new tool you have always wanted ;-)

Let's get the old circuit board removed

Removal of the push buttons
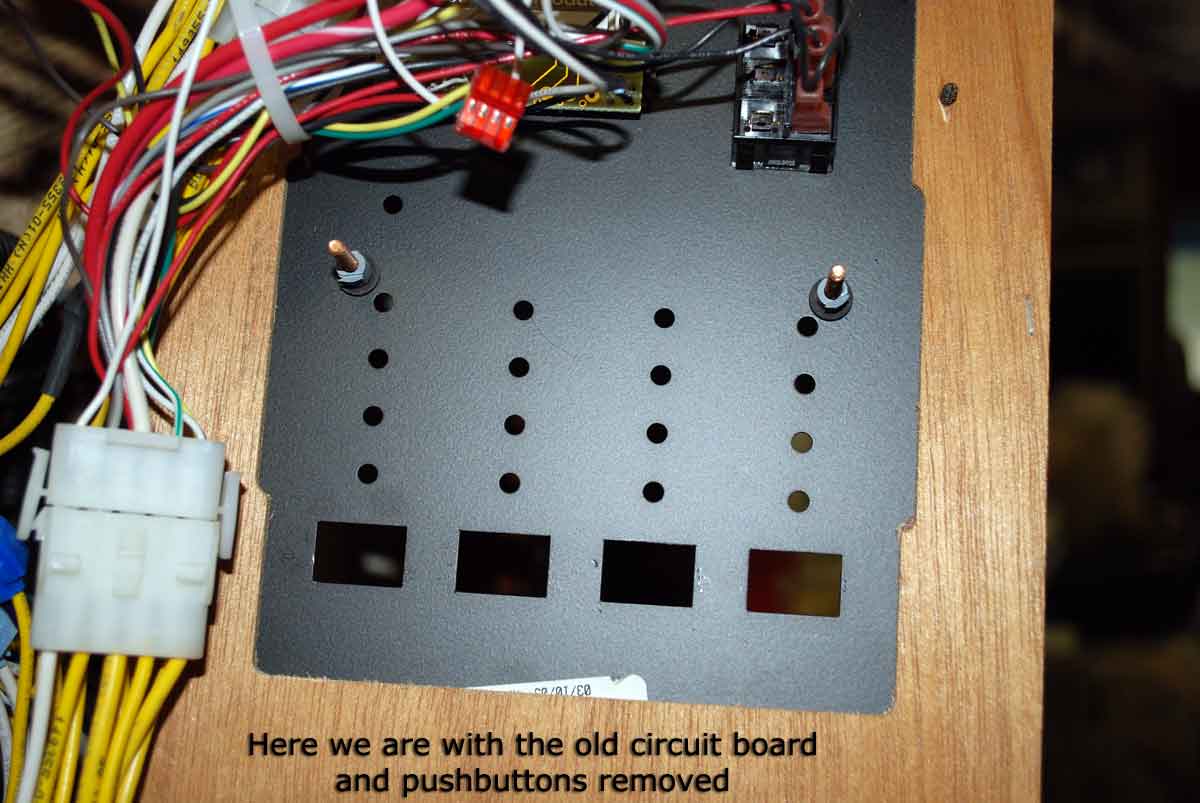
I broke off the two studs you see but I'm not sure that is necessary

Unplug the two connectors, but keep track of them in that mass of wires!

If you want to reuse the Solar panel part of the circuit board, cut on the red line! You can either A) hot-glue the board up against the backside of the panel (with the red LED sticking through its hole), or B) let it dangle back there in the mass of wires and cover up the empty hole with chewing gum or something, or C) what I did - I never liked the red LED (to me red=danger or stop) so I hot-glued a green LED in the hole and wired it to the board and hot-glued the board to the back of the panel. (Or another option is to simply unplug the solar panel and leave it unplugged. Our panels are only 10 watts which isn't enough to even keep three deep-cycle batteries from self-discharging. You could get a 50 watt panel and use the existing wiring to add a solar controller, etc., etc.)

Here's the board with the solar part cut out

And the rear of the board

Get the thermostat out of the way (assuming you have one) - just let it dangle, no need to remove the wires
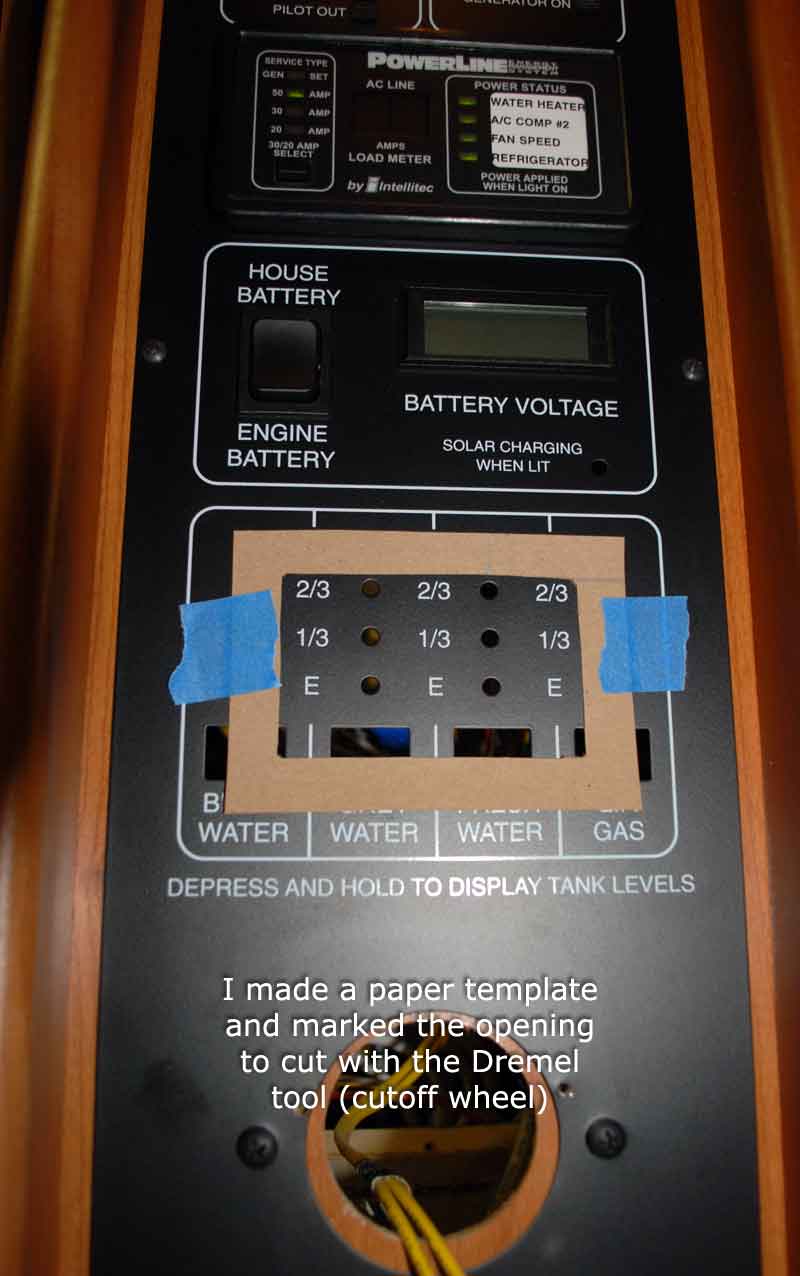
Now you can see the two square holes the new display won't cover up

After this cheapie tool broke, I purchased a real Dremel tool (although it might be made in China as well!)

I just spray painted over the old monitor graphics and lettering. If you are going to spray paint, paint the entire width of the panel and go all the way down the steel. I sprayed a small area and it would have looked a little better if I did the entire bottom part (everything below the voltmeter section. By the way, I used Rustoleum flat black spray paint and it didn't quite match the original finish. The flat black was a little too flat, the original finish is more of a 'satin' paint.
Page 1 - project introduction
Page 2 - pictures of the 'special tools' and jigs I used, picture of the Garnet system, disassembly of the plumbing bay part 1
Page 3 - we finish disassembly of the plumbing bay and look at wiring
Page 4 - we test and finish up sensor strip installation
Page 5 - building a bezel for the outside display, finishing up the outside
Page 6 - access to the fresh water tank, installing the sensor strips on the tank wall, sensor wiring
>Page 7 - we start installing the inside display, removal of the old display board & switches, cutting off the solar panel part of the old circuit board (optional), cutting an opening in the OnePlace steel panel for the new display
Page 8 - Wiring and project wrap-up