
 Jane and John's RV pages
We finally kiss the one-thirds goodbye!
Hello Garnet SeeLevel tank monitor system
>Page 5 - building a bezel for the outside display, finishing up the outside
We left off on page 4 with the gray and black sensor strips permanently installed and the wiring completed. Now we need to fabricate a bezel to mount the new display panel into the old opening. If you don't already have a similar setup with an outside monitor, then this will not exactly pertain to you, but read on - maybe you can get some value from the page.
I'm a bit of a woodworker (and an aspiring metalworker) so I have lots of wood odds 'n ends hanging around the shop (and starting to accumulate steel odds 'n ends) and for the new bezel I chose some leftover 1/8" birch plywood. 1/8" is an ideal thickness if you choose to use wood. If I had some small gauge aluminum plate available and a plasma torch, that would be my absolute first choice. Dear Santa, please bring me a 75 amp plasma torch next Christmas! No, really!!

Be sure you make the outside dimensions large enough to where you cover up the old mounting holes and then about 5/16" larger. It would have saved me some time if Garnet would have included a paper template of the display... sigh...

A good friend and long-time carpenter always had a box cutter (or knife) in his tool pouch for those 'delicate' wood situations. This was a good time for a box cutter and a very sharp chisel to cut the inside opening. Be real careful you don't create a nasty 'leak' in your hand with the box cutter - those things can be dangerous if not used with real care!
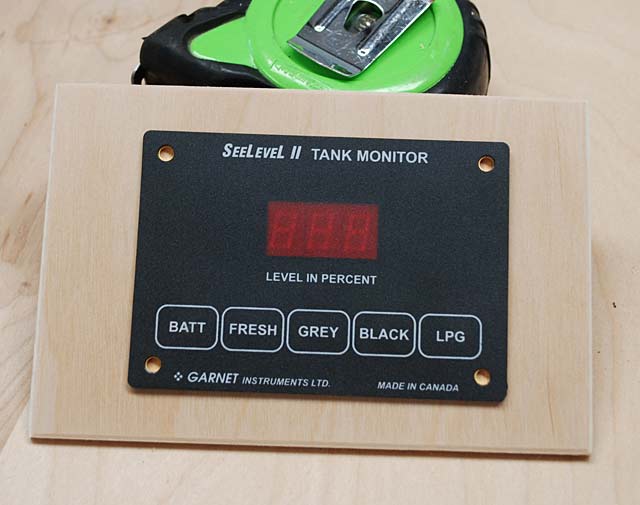
Okay - looking good here! This picture is with the wood unfinished, I chose to epoxy the wood (I am a BIG fan of WEST system epoxy - Google that) which will make it indestructible.

Here's the new wood bezel epoxied and I'm ready to drill mounting holes. Hope you didn't throw away the old steel bezel!

I found the easiest and fastest way to make these clearance holes in the steel panel was to use a coarse round wood file. Lots of woodworking tools will work okay in metal, but their life span is considerably shortened, so you sacrifice the tools for the good of the project. In this case it was a good deal for me since I rarely use a round (rat-tail) file for woodworking.

Not too shabby looking - I can live with this!
Page 1 - project introduction
Page 2 - pictures of the 'special tools' and jigs I used, picture of the Garnet system, disassembly of the plumbing bay part 1
Page 3 - we finish disassembly of the plumbing bay and look at wiring
Page 4 - we test and finish up sensor strip installation
>Page 5 - building a bezel for the outside display, finishing up the outside
Page 6 - access to the fresh water tank, installing the sensor strips on the tank wall, sensor wiring
Page 7 - we start installing the inside display, removal of the old display board & switches, cutting off the solar panel part of the old circuit board (optional), cutting an opening in the OnePlace steel panel for the new display
Page 8 - Wiring and project wrap-up